Deploy and host the application
In previous steps, the backend of the application was already published. The GraphQL API and the authentication. But we need to host the front end, the static bundles that come from our build.
As we don’t have a server to host, Amplify has a pretty well-defined CI/CD workflow working with Git by default. Here are the steps to set up a basic CI/CD:
Add Amplify hosting
Run the following command:
amplify add hosting
You can choose a manual deployment if you are just testing, but here we are going to configure it with CI/CD:

This will take you to your AWS Amplify console. Go to your amplify application and click “Connect branch”

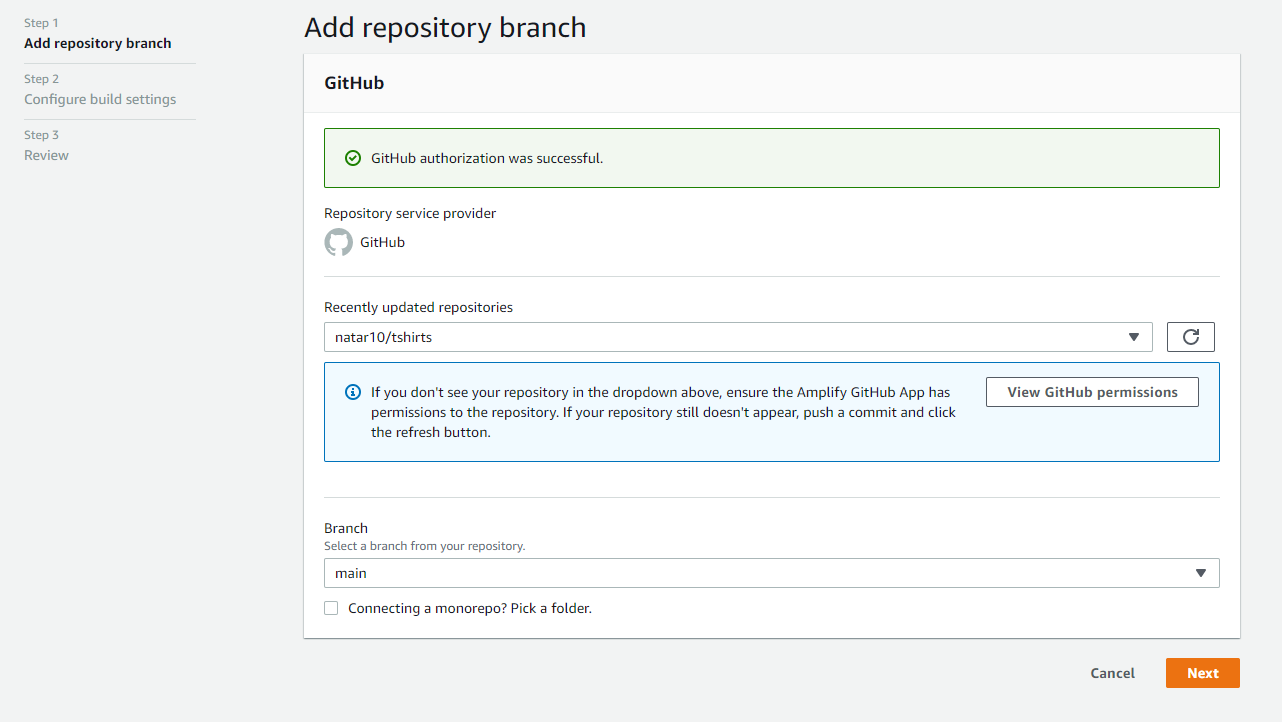
Set up your GitHub account, AWS will guide you through the process of authorizing access to your account. Once you do that, you should be able to choose the repository you want to connect to.
Also select the branch, here the recommendation should be to choose the branch that belongs to the environment you are deploying to. Branch dev to dev environment, main to production, staging, and so on.

In this step, choose the environment and the service role. If you don’t have a service role, click on create new and AWS will guide you with the defaults and it should be enough.

In this part, Amplify detects your configuration and proposes the CI steps, if something is off you can edit. For this tutorial the baseDirectory was wrong, it was updated to /dist which is the folder of the build.
Also, allow AWS to deploy the files hosted in the repository automatically.

Final review and click Save and Deploy:

This will trigger the deployment of the branch you chose, you can click on the main branch to check the process.

Once that is done, don’t forget to hit enter in the CLI command:

It will show you the Amplify domain where you can access your application. If you click before the deployment finishes, this message will be displayed:

Once deployed, you will be able to check the results and finally access your application:


Conclusions
Amplify delivers intuitive tools and quick back-end generation for your front-end applications. It can also be highly scalable with all the options it presents, for example the authentication can start with something simple like an API key but you can scale it to OAuth2, Federation authentication with Facebook, Google, Amazon, or create user groups with roles to handle different kinds of permissions. It generates infrastructure as a code with every command that is run. In the backend folder, you can see that it generates the Cloud Formation configurations for each type of service. That way you can use the same project in different environments and AWS accounts. The learning curve can be relative, it depends on the complexity of the application to be built. Something positive is that the documentation and material that you can find are excellent but you can find it difficult to start. If you don’t have that much knowledge about serverless I can suggest you check some serverless architectures, the mindset, and why to use it. The authentication provided by Cognito can be used for your web application, mobile application, e-commerce, desktop app, and anything you want to develop can be integrated with it. It has so many configurations that can also be difficult to handle so you can play with it and get to the best setup that fits your case.
Next Steps:
DynamoDB triggers are a really powerful tool to check next. It allows you to trigger lambda functions when changes are detected in the table. A use case for this application can be to detect a new order and trigger a function that sends an email with Amazon SES. AWS API gateway is the tool that controls and joins most of the services in Amplify, it is important to learn more about it. Mock the services, Amplify provides a way to test locally to avoid running tests directly in the cloud. Even though it is really cheap and environments are provided there is no harm in being careful about this.


